
When faced with an emergency where someone isn’t breathing, knowing how to use a pocket mask correctly can be a lifesaver. A pocket mask is a portable, easy-to-use device that helps deliver rescue breaths during CPR (cardiopulmonary resuscitation). It’s a critical tool for first responders, healthcare professionals, or even trained bystanders. One key factor in when using a pocket mask where should the rescuer be positioned is the rescuer’s positioning. Proper positioning ensures the mask seals tightly, delivers air effectively, and keeps both the rescuer and the victim safe. In this article, we’ll explore where the rescuer should be positioned when using a pocket mask, why it matters, and how to do it right.
This guide is written in a clear, human tone to make it easy for anyone—whether you’re a teenager learning CPR for the first time or an adult refreshing your skills—to understand. We’ll break it down step-by-step, include practical tips, and optimize the content for SEO to ensure it reaches those who need it most.
What Is a Pocket Mask and Why Is Positioning Important?
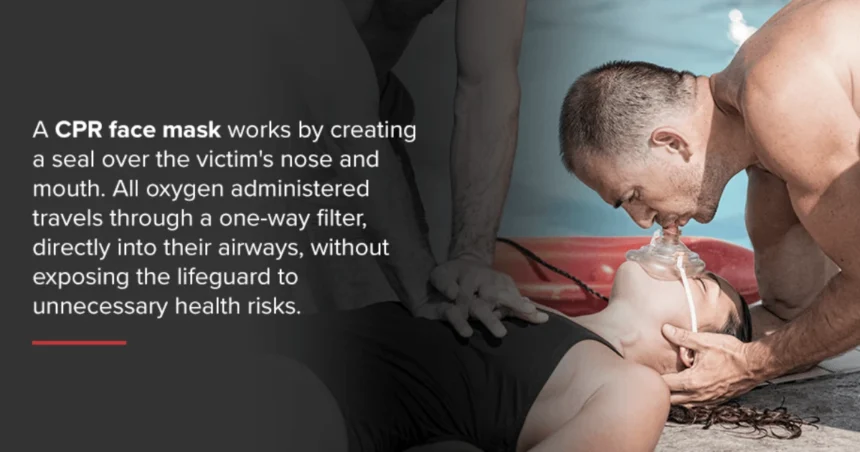
A pocket mask is a small, collapsible device used to provide rescue breaths during CPR. It has a one-way valve to prevent the rescuer’s breath from mixing with the victim’s exhaled air, reducing the risk of disease transmission. The mask covers the victim’s nose and mouth, creating a seal to deliver oxygen effectively.
Positioning is critical when using a pocket mask because it directly affects:
- Seal Quality: A proper seal ensures air goes into the victim’s lungs and doesn’t leak out.
- Airway Management: Correct positioning opens the victim’s airway, making breaths more effective.
- Rescuer Comfort and Safety: Good positioning reduces strain and keeps the rescuer safe from hazards like bodily fluids.
- Efficiency: Proper alignment allows the rescuer to deliver consistent, effective breaths without fatigue.
Now, let’s dive into the specifics of where the rescuer should be positioned and how to achieve it.
Where Should the Rescuer Be Positioned?
When using a pocket mask, the rescuer’s position depends on the victim’s location (e.g., on the ground, a bed, or a stretcher) and the situation (e.g., one-rescuer or two-rescuer CPR). However, the most common and recommended position is above the victim’s head. Here’s a closer look at why this position works and how to do it correctly.
1. Positioning Above the Victim’s Head (Top-of-Head Position)
Why It’s Ideal:
- Airway Control: Being above the head allows the rescuer to tilt the victim’s head back and lift the chin to open the airway.
- Mask Seal: This position gives the rescuer a clear view of the mask placement, ensuring a tight seal over the nose and mouth.
- Ease of Breathing: The rescuer can blow air directly into the mask’s valve while maintaining a stable position.
- Comfort: It reduces strain on the rescuer’s back and arms compared to leaning over from the side.
How to Position Yourself:
- Kneel or Sit Above the Victim’s Head:
- If the victim is on the ground, kneel directly behind their head.
- If they’re on a raised surface like a bed or stretcher, stand or sit at the head of the surface.
- Align Your Body: Keep your shoulders directly over the victim’s face to maintain control and balance.
- Hold the Mask Firmly: Use both hands to secure the mask—one hand on each side—to create a tight seal. Your thumbs should press down on the mask’s edges, and your fingers should support the victim’s jaw.
- Tilt the Head Back: Gently tilt the victim’s head back and lift their chin to open the airway. Avoid overextending the neck, especially in infants or if a spinal injury is suspected.
Pro Tip: If you’re kneeling on a hard surface, place a folded towel or mat under your knees to stay comfortable during prolonged CPR.
2. Alternative Positioning: From the Side
In some cases, positioning above the head may not be possible due to space constraints or the victim’s location (e.g., in a tight space or against a wall). In these situations, the rescuer can position themselves to the side of the victim’s head.
When to Use Side Positioning:
- When access to the head is blocked (e.g., in a confined space).
- During two-rescuer CPR, where one rescuer performs chest compressions from the side, and the other handles ventilations.
How to Position Yourself:
- Kneel or Sit Beside the Victim’s Head: Position yourself on one side, close to the victim’s shoulder.
- Angle the Mask Properly: Hold the mask with both hands, ensuring it covers the nose and mouth completely.
- Maintain Airway Control: Use one hand to tilt the head back and lift the chin while the other secures the mask.
- Lean Slightly Forward: This helps you apply enough pressure to create a seal without straining.
Challenges with Side Positioning:
- It’s harder to maintain a consistent seal compared to the top-of-head position.
- You may need to adjust your angle to see the victim’s chest rise, confirming effective breaths.
- Fatigue can set in faster due to the awkward angle.
Pro Tip: If you’re working from the side, practice switching sides periodically to avoid strain, especially during prolonged CPR.
Step-by-Step Guide to Using a Pocket Mask
To better understand positioning, let’s walk through the process of using a pocket mask, emphasizing where the rescuer should be:
- Assess the Situation:
- Ensure the scene is safe before approaching the victim.
- Check for responsiveness by tapping the victim and shouting, “Are you okay?”
- If unresponsive and not breathing normally, call for help or instruct someone to call emergency services.
- Position Yourself:
- Kneel or stand above the victim’s head (preferred) or to the side if necessary.
- Ensure you have enough space to work comfortably.
- Open the Airway:
- Place one hand on the victim’s forehead and gently tilt their head back.
- Use two fingers of your other hand to lift the chin, opening the airway. For infants, avoid excessive tilting—use a neutral position.
- Place the Pocket Mask:
- Position the mask over the victim’s nose and mouth, ensuring the narrow end is over the nose.
- Press down firmly with both hands to create a tight seal. Your thumbs should be on the mask, and your fingers should support the jaw.
- Deliver Rescue Breaths:
- Take a normal breath, seal your lips around the mask’s mouthpiece, and blow steadily for about one second.
- Watch for the victim’s chest to rise, indicating air is entering the lungs.
- Allow the chest to fall completely before delivering the next breath.
- Combine with Chest Compressions (if trained):
- If performing CPR, alternate between 30 chest compressions and two rescue breaths (for adults).
- Maintain your position above the head for ventilations, even if another rescuer handles compressions.
Note: If you’re not trained in CPR or uncomfortable with rescue breaths, perform hands-only CPR (chest compressions only) and call for help.
Special Considerations for Different Scenarios
The rescuer’s positioning may vary slightly depending on the situation. Here are some common scenarios and how to adapt:
1. Infant or Child CPR
- Positioning: Always position yourself above the head for infants and children. For infants, you may need to sit or kneel closer to the ground due to their smaller size.
- Mask Use: Use a pediatric-sized pocket mask if available. Ensure the mask fits snugly over the nose and mouth without covering the eyes or chin.
- Airway Caution: Be gentle when tilting the head—infants require a neutral position, and children need a slight tilt to avoid airway blockage.
2. Two-Rescuer CPR
- Positioning: One rescuer kneels beside the victim’s chest to perform compressions, while the other positions themselves above the head for ventilations.
- Coordination: The ventilation rescuer should maintain a steady rhythm, delivering breaths during pauses in compressions.
3. Suspected Spinal Injury
- Positioning: Stay above the head but avoid tilting the head back. Instead, use the jaw-thrust maneuver to open the airway without moving the neck.
- How to Perform Jaw Thrust:
- Place your fingers behind the angles of the victim’s jaw.
- Lift the jaw upward to open the airway while keeping the head stable.
- Apply the pocket mask and deliver breaths as usual.
4. Victim on a Soft Surface (e.g., Bed)
- Positioning: Stand or sit at the head of the bed. If possible, move the victim to a firm surface for effective compressions.
- Mask Seal: Ensure the mask is pressed firmly to compensate for any movement on the soft surface.
Common Mistakes to Avoid
Even with the right positioning, mistakes can happen. Here’s what to watch out for:
- Poor Mask Seal: If air leaks out, reposition the mask and press harder with both hands.
- Incorrect Head Tilt: Over-tilting can block the airway, especially in infants. Use a gentle tilt or neutral position as needed.
- Wrong Positioning: Being too far from the victim’s head can make it hard to maintain a seal or control the airway.
- Inadequate Breaths: Blow steadily for one second, ensuring the chest rises. Avoid quick, shallow puffs.
Why Proper Positioning Saves Lives
Correct positioning when using a pocket mask ensures that rescue breaths are delivered effectively, increasing the victim’s chance of survival. According to the American Heart Association, high-quality CPR, including proper ventilations, can double or triple survival rates for cardiac arrest victims. By positioning yourself correctly, you’re not just following protocol—you’re making a real difference.
FAQs About when using a pocket mask where should the rescuer be positioned
Q: Can I use a pocket mask from any position?
A: The top-of-head position is best for control and seal quality, but you can use the side position if space is limited. Always prioritize a tight mask seal and an open airway.
Q: What if I can’t get a good seal with the mask?
A: Reposition the mask, press harder with both hands, and ensure the victim’s airway is open with a proper head tilt or jaw thrust.
Q: Do I need to be trained to use a pocket mask?
A: Training is highly recommended. A CPR course teaches you how to position yourself and use the mask correctly.
Q: Can I use a pocket mask on an infant?
A: Yes, but use a pediatric-sized mask and be gentle with head positioning to avoid airway blockage.
Q: What if the victim is in a confined space?
A: Position yourself to the side of the head and adjust your angle to maintain a seal and open airway.
Conclusion
Using a pocket mask correctly during CPR can be a game-changer in an emergency, and proper positioning is the foundation of success. By placing yourself above the victim’s head (or to the side when necessary), you can ensure a tight mask seal, maintain an open airway, and deliver effective rescue breaths. Whether you’re a trained professional or a bystander stepping in to help, understanding where to position yourself makes all the difference.